When I finished my raku course, I tried not to post all my photos at once. But suddenly a month has gone by, and I still have many to post. So far I've posted photos from the firing, then the horsehair raku pots, the glazed raku pots and pendants, my naked raku pot, and a peek at my raku lady on display at Shadbolt Center for the Arts.
One of the raku methods I was least familiar with, and didn't know if I'd be satisfied with the outcome, was the foil saggar firing. We were told to collect up various organic materials, and bring them to class. Dried seaweed, fertilizer, horse dung (I was very tempted to collect some at the equestrian center, but I'm glad I didn't), dried rose petals, copper wire, etc.
Here is my first pot, getting wrapped in the organic materials and foil :
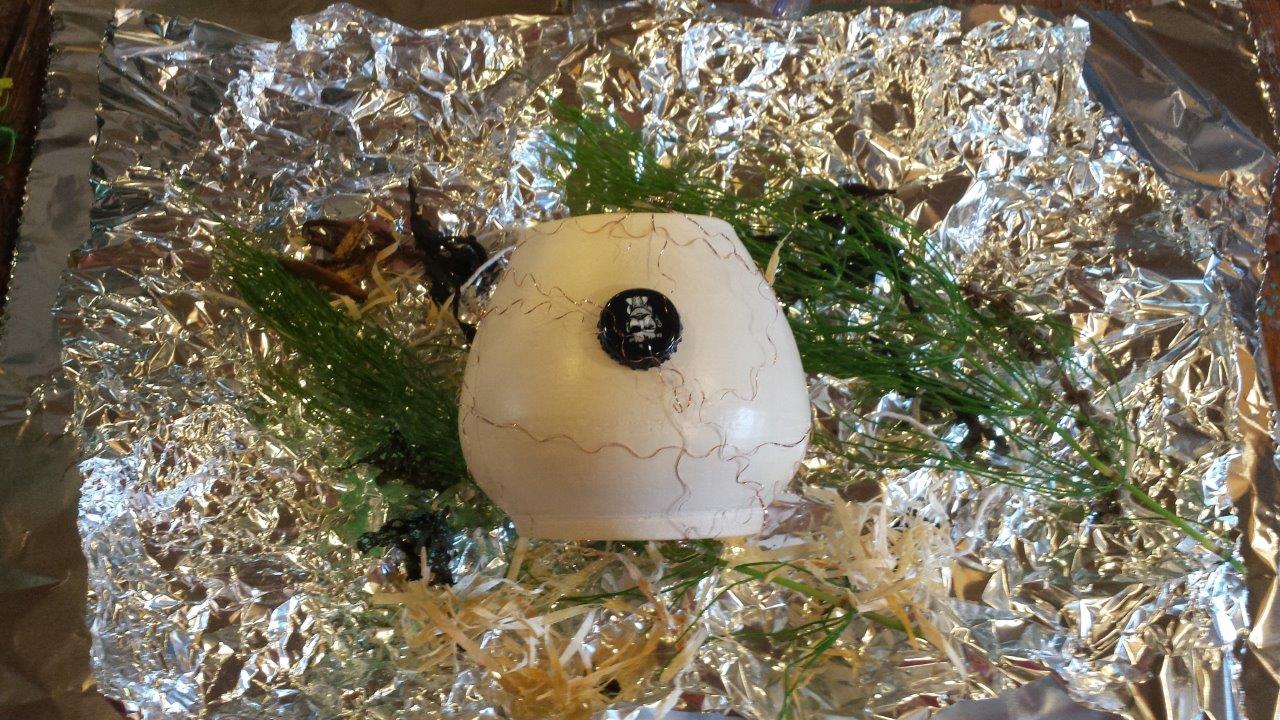
I can't remember all that was in there, but from the photo, I see pine cones, bottle caps, horsetails (which contain silica), wood shavings, sea weed, some immature cottonwood fluffs, and a sprinkle of "magic dust".
I wrapped the pot itself in copper strands (from a pulled apart metal scrubby) and the bottle cap.
The second pot had similar ingredients, as well as dried burdock, and some pellets of fertilizer. It was also wrapped in the copper wire, bottle caps, but also cotton string which had been soaked in salt, and some fresh rhododendron flowers :
They were then wrapped in foil and fired, and the following week we collected them, and unwrapped them, to reveal our finished pots. Here are some of them, still wrapped in foil. One of mine on the bottom shelf is peeking out :
Here are the final pots from a couple of different angles. I'm pretty pleased with the result :
Here is a closeup of the first one :
...and the second one :
Here's a table full of my classes's creations. I love that one in the front (bottom left in the photo) with the dramatic blackish pink lines. These were also formed by the same copper strands as I used, but somehow the location in the kiln or perhaps another ingredient contributed to the dramatic colours.
It was fascinating to see the wide range of colours, from the pinks to oranges, to shades of grey and black.
Stay tuned for the horsehair raku plates, and the obvara raku fired pieces, when I find time to post again.
Thursday, July 2, 2015
Thursday, June 11, 2015
Raku Lady on Display and Garden Head out in the Garden
Even while my big swirly platter is still on display at Shadbolt, my raku lady (see end of this post) is now on display as well, in the glass case on the outside of the pottery studio building. Pretty cool.
There are 6 pieces from my Raku Sampler class on display, although I see names of 7 people in my class, so there may be another piece coming soon - a naked raku piece.
Here she is, in closeup :
In the garden, I am still working on getting that second totem set up. I want to buy a rebar rod for it, and I guess I don't have a topper piece for it, although I could take on of my small vases and turn it upside down (except the bottom would be unglazed), or I could even put my raccoon out in the garden, where he really belongs.
In the meantime, I moved my planter head out, and gave him some Black Mondo Grass hair, and surrounded him with creeping thyme :
He looks very peaceful there, in the shade of a small tree. I think he enjoys being out there more than on the shelf inside the house.
There are 6 pieces from my Raku Sampler class on display, although I see names of 7 people in my class, so there may be another piece coming soon - a naked raku piece.
Here she is, in closeup :
In the garden, I am still working on getting that second totem set up. I want to buy a rebar rod for it, and I guess I don't have a topper piece for it, although I could take on of my small vases and turn it upside down (except the bottom would be unglazed), or I could even put my raccoon out in the garden, where he really belongs.
In the meantime, I moved my planter head out, and gave him some Black Mondo Grass hair, and surrounded him with creeping thyme :
He looks very peaceful there, in the shade of a small tree. I think he enjoys being out there more than on the shelf inside the house.
Wednesday, June 10, 2015
Remainder of my Spring Ahead (Garden) Pieces
Before I continue with the raku pieces, I want to post the Spring Ahead pieces and some pieces which I created during open workshop prior to my raku course, which I finally picked up today. I had already forgotten about a couple of these (although my book of notes hadn't), so it was a nice surprise to be able to pick up so many today.
32) This big boy is similar to the big swirly bowl which is currently on display at Shadbolt. Except this one has a thrown pedestal added to it, I finished the swirls in Tenmoku as well as Deep Blue, and I glazed in Clear instead of Celadon. I like how it turned out, although I don't know what I'll end up doing with it. I don't want a birdbath for the yard. It may end up as a large fruit bowl on my counter, just like the other big bowl.
33) This may not be as big, but it is a really weighty piece. It was the one which was thrown upside down as a dome, then flipped over, and what used to be the bottom is slumped and formed into the nice concave curve. Then I threw a base for it. I glazed it in Tenmoku, then Copper Red on the top. I like the glaze combination, and how the Copper flows and interacts with the Tenmoku.
I see in my previous comments that in future I may want to carve the outer wall, since it is double-walled. I'm glad I recorded that thought, since it seems like a nice project to try one day.
34) This is one of the vessels I tried to deform so I could twist it. The twisting was unsuccessful, but the shape of the vase wasn't. It is quite bottom heavy, since it was hard to trim after deforming the sides, so it has a crack in the bottom. I don't believe the glaze has filled it in, so it will not hold water, but would be fine for holding something dry, or just for display.
The glaze is quite a combination of colors, so it has lots of character. First I glazed with Copper Red inside and Bamboo outside. Then I dipped in overlapping Tenmoku, Matt Green and Deep Blue. If I study the results more carefully, I'm sure I'll learn a lot about how those glazes interact.
35) This is the other piece I tried to deform, unsuccessfully, but ended up with an interesting shape. My glaze notes are as follows : "Copper Red inside. Deep Blue top. Matt Green bottom. Clear over Matt Green. Drizzled Tenmoku inside and outside."
36) This little sushi plate uses one of my favourite glaze combinations, with a twist. I added Copper Red to the top and then wiped it off, leaving it only in the recesses, then glazed with a barely overlapping Tenmoku and Deep Blue. Now that I read the notes about the Copper Red, I can see little bits of red in the Deep Blue. But on the Tenmoku side, rather than making the color a richer chocolate, it is surprisingly more clear and glassy in those parts. As if it caused the chocolate to melt more in those places. Maybe something like the "conching process" in forming quality chocolate - read more about it on the Lindt website. :-)
37) There's a lot going on with this piece. It is a cube I built from some extruded rectangular sections which I didn't know what to do with (I had decided not to build the demo project). It will form part of another garden totem.
The opposite sides are glazed in Deep Blue, Celadon, and Tenmoku. But there are other colors from my underglazes, in Yellow (flowers), Red (squiggle pattern), Greens (leaves). I experimented with waxing those parts which were colored with underglaze, and they resisted the glaze nicely. So other than being a time consuming process, I think it is a promising one.
38) This second cube, I decided to give it a "weather" theme. It is glazed on three sides with Celadon, and three sides with Deep Blue. There is Yellow underglaze on the stars and sun, otherwise the other parts were left uncolored (so just the natural grey clay), and again, I waxed the designs before glazing.
For both blocks, I had glazed all 6 sides and then realized I wouldn't be able to put these on the kiln shelves. So I added 4 balls of wadding, but should have removed the glaze from those spots before attaching the wadding, since they of course stuck, and I needed to bang them off with a makeshift hammer. If it were an indoor piece, I would need to file them also (too much work!) but since they will be in an outdoor totem, I'll just leave those funny white bits of wadding as a conversation piece. At least I learned for next time.
As I look back in my previous post from my Spring Ahead course, I realize I may not have posted this little plate, which I think I picked up later than the other pieces (it was hiding under someone else's piece), so I'll post it now.
31) This plate was thrown with the assistance of a "cow's tongue". Then I tried to marble with Turquoise and Black slip, except I remember the slips were too dry, and wouldn't cooperate, so I added extra slip a couple more times, until I was satisfied enough with the result. Then it was finished in Celadon glaze. Cute little piece. I like the foot with the spiral center. That is not quite yet a trademark of my trimming, but I use it quite a bit, with satisfaction in the result.
32) This big boy is similar to the big swirly bowl which is currently on display at Shadbolt. Except this one has a thrown pedestal added to it, I finished the swirls in Tenmoku as well as Deep Blue, and I glazed in Clear instead of Celadon. I like how it turned out, although I don't know what I'll end up doing with it. I don't want a birdbath for the yard. It may end up as a large fruit bowl on my counter, just like the other big bowl.
33) This may not be as big, but it is a really weighty piece. It was the one which was thrown upside down as a dome, then flipped over, and what used to be the bottom is slumped and formed into the nice concave curve. Then I threw a base for it. I glazed it in Tenmoku, then Copper Red on the top. I like the glaze combination, and how the Copper flows and interacts with the Tenmoku.
I see in my previous comments that in future I may want to carve the outer wall, since it is double-walled. I'm glad I recorded that thought, since it seems like a nice project to try one day.
34) This is one of the vessels I tried to deform so I could twist it. The twisting was unsuccessful, but the shape of the vase wasn't. It is quite bottom heavy, since it was hard to trim after deforming the sides, so it has a crack in the bottom. I don't believe the glaze has filled it in, so it will not hold water, but would be fine for holding something dry, or just for display.
The glaze is quite a combination of colors, so it has lots of character. First I glazed with Copper Red inside and Bamboo outside. Then I dipped in overlapping Tenmoku, Matt Green and Deep Blue. If I study the results more carefully, I'm sure I'll learn a lot about how those glazes interact.
35) This is the other piece I tried to deform, unsuccessfully, but ended up with an interesting shape. My glaze notes are as follows : "Copper Red inside. Deep Blue top. Matt Green bottom. Clear over Matt Green. Drizzled Tenmoku inside and outside."
36) This little sushi plate uses one of my favourite glaze combinations, with a twist. I added Copper Red to the top and then wiped it off, leaving it only in the recesses, then glazed with a barely overlapping Tenmoku and Deep Blue. Now that I read the notes about the Copper Red, I can see little bits of red in the Deep Blue. But on the Tenmoku side, rather than making the color a richer chocolate, it is surprisingly more clear and glassy in those parts. As if it caused the chocolate to melt more in those places. Maybe something like the "conching process" in forming quality chocolate - read more about it on the Lindt website. :-)
37) There's a lot going on with this piece. It is a cube I built from some extruded rectangular sections which I didn't know what to do with (I had decided not to build the demo project). It will form part of another garden totem.
The opposite sides are glazed in Deep Blue, Celadon, and Tenmoku. But there are other colors from my underglazes, in Yellow (flowers), Red (squiggle pattern), Greens (leaves). I experimented with waxing those parts which were colored with underglaze, and they resisted the glaze nicely. So other than being a time consuming process, I think it is a promising one.
38) This second cube, I decided to give it a "weather" theme. It is glazed on three sides with Celadon, and three sides with Deep Blue. There is Yellow underglaze on the stars and sun, otherwise the other parts were left uncolored (so just the natural grey clay), and again, I waxed the designs before glazing.
For both blocks, I had glazed all 6 sides and then realized I wouldn't be able to put these on the kiln shelves. So I added 4 balls of wadding, but should have removed the glaze from those spots before attaching the wadding, since they of course stuck, and I needed to bang them off with a makeshift hammer. If it were an indoor piece, I would need to file them also (too much work!) but since they will be in an outdoor totem, I'll just leave those funny white bits of wadding as a conversation piece. At least I learned for next time.
As I look back in my previous post from my Spring Ahead course, I realize I may not have posted this little plate, which I think I picked up later than the other pieces (it was hiding under someone else's piece), so I'll post it now.
31) This plate was thrown with the assistance of a "cow's tongue". Then I tried to marble with Turquoise and Black slip, except I remember the slips were too dry, and wouldn't cooperate, so I added extra slip a couple more times, until I was satisfied enough with the result. Then it was finished in Celadon glaze. Cute little piece. I like the foot with the spiral center. That is not quite yet a trademark of my trimming, but I use it quite a bit, with satisfaction in the result.
Naked Raku Pot - Rewaxed
When I waxed it the first time, I realized there were spots which didn't polish up, and looked dirty. So I took a metal scrubby and dish soap, and scrubbed these areas. I found that some of them needed to be scraped. I used my thumbnail until I wore my thumbnail down, and then I switched to a knife blade, to scrape these rough bits off. Then I dried the piece and rewaxed it. Now it is quite uniformly shiny and smooth, and the colors show through beautifully :
There's something about this piece, which has strong colors and shine, but is not glazed, which is really appealing. It has an earthy, natural feel to it.
Tuesday, June 9, 2015
Raku Results : Naked Raku Pot
I've already posted some of my horsehair raku vessels and glazed raku pieces. One of the other techniques we tried in our recent raku pottery course was naked raku. Since it is a tricky process, we each only made one item. This photo was taken before I waxed the piece, showing the dramatic difference in color from the piece when dry (left) and when doused with water (right) :
So I knew this piece would benefit from waxing, which it did. I may even try to apply more wax, there are some areas which still appear to be "dry". Or perhaps I need to scrub down these areas more carefully. We'll see. Here's another view of that piece, after waxing :
9) This vase was finished in turquoise terra sig. Masking tape was applied to form the pattern of lines, before brushing on the sacrificial slip. Then when the tape was pulled off, it was touched up by brush to replace small bits of the slip which was pulled off inadvertently. I am glad the slip stayed on well, and provided that beautiful crackle pattern, and the pot has a lovely unglazed feel to it. If I had done a better job of finishing while throwing and polishing with terra sig, I think it would be even more smooth and beautiful. If I have opportunity again, I think I would like to make another naked raku piece.
So I knew this piece would benefit from waxing, which it did. I may even try to apply more wax, there are some areas which still appear to be "dry". Or perhaps I need to scrub down these areas more carefully. We'll see. Here's another view of that piece, after waxing :
9) This vase was finished in turquoise terra sig. Masking tape was applied to form the pattern of lines, before brushing on the sacrificial slip. Then when the tape was pulled off, it was touched up by brush to replace small bits of the slip which was pulled off inadvertently. I am glad the slip stayed on well, and provided that beautiful crackle pattern, and the pot has a lovely unglazed feel to it. If I had done a better job of finishing while throwing and polishing with terra sig, I think it would be even more smooth and beautiful. If I have opportunity again, I think I would like to make another naked raku piece.
Raku Results : Glazed Raku Vessels and Pendants
It may have been the horsehair raku which first peaked my interest in raku, but I very soon became intrigued by the glittery and often iridescent colors and crackled look of glazed raku pieces. These are the 3 pots which I made in the raku course :
...and these are the glazed pendants :
I am pleased by the results.
Here are the pots, one by one:
4) I was really pleased by the shape of this one. It was almost exactly the shape I had set out to throw. I originally intended to make a cutout pattern on the flat top, but the course was already so busy, and I was afraid there would be more chance of breakage, so I decided to leave it as is. The top and bottom are finished with terra sig and polished. The sides are glazed with a glaze that was labelled Piepenburg Red-Bronze, but the sample we were provided was this same brilliant green, with lots of color variations and the crackle effect. I am not disappointed. It doesn't show up too well in the photos, but parts of the glaze are a coppery metal color (see top left and middle right photos).
5) This one is a candleholder. It is finished in a glaze called Apple Crackle. I'm pretty happy with the result. The bottom is finished with terra sig and polished, but the rim and inside are the unpolished clay, so has a nice rough texture. Here it is with a tealight inside, sitting on the bathroom counter. It doesn't cast too many dragonflies on the counter, but sends dragonflies flying on the walls nearby. Nice.
6) This one was just a little piece I hand formed with some extra clay I didn't want to throw away, but I thought it could make a little spacer in my garden totem. It is glazed with Piepenburg Red-Bronze. The unglazed parts are just the natural clay, no terra sig. I didn't try to stamp or initial it. I think I'll be able to fit it into my totem somewhere.
7) I was inspired to try some jewelry pieces, for my friend Shelley. Ultimately, I need to make some smaller pieces which she can incorporate into her handcrafted beaded bracelets. These heart pendants turned out nicely, for my first experiment with jewelry. I scratched my initial into the back side of each, since the stamp was out of the question (note to self : order a small stamp also).
7A) This one was finished with white terra sig, then used in horsehair raku, with a few strands of horsehair and a sprinkling of berry sugar. The ferric chloride was sprayed on front and back after it had cooled quite a bit, so thus the lighter yellow color.
7B) The black pattern was created with masking tape, and the glazes are Red, Apple Crackle, and a White/Clear Crackle glaze. All these pieces were fired in a wire basket, so they could be removed and placed into the combustibles. So the wire pattern has shown through on the back. It was unexpected, but I have to say I like it.
7C) Again, the black pattern was formed by masking tape, and then glazed in Red.
8) These colorful pendants were made from some leftover clay, but I like them so much, I think if I took another raku course, I think I would make more pendants. Again, they show a funky pattern on back from the pieces sitting in the wire basket, and my small initial "L" on the back.
8A) This one is glazed in White Crackle, Red, Piepenburg Red-Bronze, and White.
8B) This one is glazed in White, Piepenburg Red-Bronze, Red, and Beetlejuice.
8C) This one is glazed in Piepenburg Red-Bronze, Red, White and Piepenburg Red-Bronze again.
Stay tuned for more posts, as I make my way through the many pieces from our raku course.
Monday, June 8, 2015
Raku Results : Horsehair Raku Pots
I have held back from posting my raku pieces until I bought wax. I was looking for beeswax polish for furniture, as Linda recommended. But what I found at Home Depot today was a paste wax for finishing furniture and wood floors. The sales associate said it was the type his mom used for their floors, and he had fond memories of the smell of it. It doesn't leave that acrylic residue, and polishes up nice. So I tried it, and it seems to work well. Since the items will not be used for food, the cleaner type smell (which he says diminishes fairly quickly) is not a problem.
I will post a few items at a time. First the horsehair raku pots, since it was the horsehair pottery which first sparked my interest in raku. It didn't disappoint. I love these three items. All three bear my signature stamp near their bottoms.
From this side, you can see that I used feathers on all 3 vases. I wasn't sure I would like the feathers, but the first one I tried seemed to work out very well, so I was encouraged to try more.
From this side, you can see more of the horsehair (squiggles) and the gold to brown colors added by the ferric chloride spray.
Here they are, one at a time. First, the piece when unwaxed :
Then the piece after waxing. I think the colors are more vibrant and they have more depth, and there is a nice sheen to the piece :
1) This is one of my favourites from this raku course. I was really pleased with the shape of this piece, and it has a nice light feel to it (I am getting better at throwing and trimming). It has the imprint of two feathers, squiggles of horsehair, small dots from berry sugar on the outside and inside, and some human hair (finer squiggles - I seem to remember these were from my husband) on the inside bottom. I thought the human hair would be a nice touch, my family would appreciate that I thought of them in pottery class. Instead, they seem to think it is a bit creepy, and my sixteen year old wasn't sure about having their "DNA" in my pots. Hmmm. Okay. I thought it was kind of fun, and since I am responsible for haircuts for the whole family, I gathered it legitimately; I wasn't creeping around at night cutting bits off. The ferric chloride at bottom was sprayed when the pot was really hot, so the color is a chocolaty orange. Then it was flipped over and allowed to cool a bit more before spraying again, so the color on top is more yellow.
2) I'm loving this one more every time I see it. It is a little bottom heavy, which tells me I didn't trim enough, but the throwing was pretty clean, and I like the shape. It has a nice feather imprint, large squiggles of horsehair, and a mess of human hair squiggles near the top. Again, a few dots of sugar (including on the foot), and some random sprays of ferric chloride. I love that colour, it really completes the piece.
3) I'm liking this piece more every day, too. It started out as a penguin, who lost his head during throwing, so I made it a small cup / vase. The yellow at the bottom half is from yellow terra sig. So since it already had color, I didn't spray it with ferric chloride. It has the imprint of two feathers, horsehair, some sugar, and human hair on the inside bottom.
Speaking of penguins, I got it in my head that one of my raku pieces should be a penguin. He was going to be finished in crackle glaze (tummy) and black smoke (the remainder of him). Remember this guy from my previous terra sig post?
This was my penguin after the bisque firing :
Poor guy had a small hole in his back side, but it apparently wasn't big enough, so he exploded. At least I didn't lose any pieces during the terra sig and polishing. A number of my classmates were not so fortunate. So I'll need to do raku again, to make another attempt at a penguin. This one will have a very large hole on the bottom, so there is no chance to explode.
Stay tuned for more photos, when I next have time to post.
I will post a few items at a time. First the horsehair raku pots, since it was the horsehair pottery which first sparked my interest in raku. It didn't disappoint. I love these three items. All three bear my signature stamp near their bottoms.
From this side, you can see that I used feathers on all 3 vases. I wasn't sure I would like the feathers, but the first one I tried seemed to work out very well, so I was encouraged to try more.
From this side, you can see more of the horsehair (squiggles) and the gold to brown colors added by the ferric chloride spray.
Here they are, one at a time. First, the piece when unwaxed :
Then the piece after waxing. I think the colors are more vibrant and they have more depth, and there is a nice sheen to the piece :
1) This is one of my favourites from this raku course. I was really pleased with the shape of this piece, and it has a nice light feel to it (I am getting better at throwing and trimming). It has the imprint of two feathers, squiggles of horsehair, small dots from berry sugar on the outside and inside, and some human hair (finer squiggles - I seem to remember these were from my husband) on the inside bottom. I thought the human hair would be a nice touch, my family would appreciate that I thought of them in pottery class. Instead, they seem to think it is a bit creepy, and my sixteen year old wasn't sure about having their "DNA" in my pots. Hmmm. Okay. I thought it was kind of fun, and since I am responsible for haircuts for the whole family, I gathered it legitimately; I wasn't creeping around at night cutting bits off. The ferric chloride at bottom was sprayed when the pot was really hot, so the color is a chocolaty orange. Then it was flipped over and allowed to cool a bit more before spraying again, so the color on top is more yellow.
2) I'm loving this one more every time I see it. It is a little bottom heavy, which tells me I didn't trim enough, but the throwing was pretty clean, and I like the shape. It has a nice feather imprint, large squiggles of horsehair, and a mess of human hair squiggles near the top. Again, a few dots of sugar (including on the foot), and some random sprays of ferric chloride. I love that colour, it really completes the piece.
3) I'm liking this piece more every day, too. It started out as a penguin, who lost his head during throwing, so I made it a small cup / vase. The yellow at the bottom half is from yellow terra sig. So since it already had color, I didn't spray it with ferric chloride. It has the imprint of two feathers, horsehair, some sugar, and human hair on the inside bottom.
Speaking of penguins, I got it in my head that one of my raku pieces should be a penguin. He was going to be finished in crackle glaze (tummy) and black smoke (the remainder of him). Remember this guy from my previous terra sig post?
This was my penguin after the bisque firing :
Poor guy had a small hole in his back side, but it apparently wasn't big enough, so he exploded. At least I didn't lose any pieces during the terra sig and polishing. A number of my classmates were not so fortunate. So I'll need to do raku again, to make another attempt at a penguin. This one will have a very large hole on the bottom, so there is no chance to explode.
Stay tuned for more photos, when I next have time to post.
Subscribe to:
Posts (Atom)