Wednesday, March 7, 2018

Pine (and Cedar) Weaving Course

We were so fortunate that Linda's sister, Lynette, was willing to share her pine needle weaving (coiling) techniques with us.  My friend Roma arranged for the course, and her son paid for Lynette's flight from Fort Nelson, to be with us for the weekend.  What an amazing weekend it was.

I hope they don't mind posting a photo of Lynette and Linda, who started with a slide show of how their collaboration started 12 years ago, and a sampling of the wonderful work which they have created together.

We were asked to make some pots with holes in the rim, for weaving, but due to the short timeframe, most of us didn't have much chance to make our own pots.  So Linda graciously made a set of pots which we could work with, and they supplied us with the Ponderosa Pine needles and sinew (for the stitching/coiling), and other supplies.

This is a shot of some of the work which our class produced this weekend.  It was really fun that although we started with a very similar base, each person put a unique twist on their work, some embellishing with beads, others with handles or other decorations. 

I had prepared my raku pots with really large holes, and I soon realized that the scale of the pots, and the dark colors, didn't suit the pine needles.  They could be stained, but I still think they didn't suit the scale and boldness of the pots.  So I was very pleased when my friend Robin found some cedar branches outside, and started weaving them into her pot.

Here is the class photo with the big cedar pieces added in :

The next day, I went out collecting cedar branches which had fallen in a nearby park, even through two flurries of hail :

I was really pleased with how this cedar, and a black hemp cord, looked with my raku pots:

I finished the lidded pot from Linda, and this cedar pot, in class, and brought home a little platter to finish up on Sunday night.  So these are the three finished pieces I ended up with from the weekend :

...with a closeup of the lidded pot :

...and of the little platter (with handles that look a bit too big, when I look at them now) :
It was such much fun to spend the weekend creating, with a great group of friends and fellow creative people.  My hands were a bit cramped the next day at work, but it was so worth it.

So Much Pottery Going On

I have been blessed recently with lots of pottery activities.  The recent raku firing, and then the pine needle weaving course this past weekend, and lots of finished work coming out of the gas kiln.

Today was my last day for pottery before Spring Break.  So I was happy that I glazed nearly all my remaining items, and then created this beautiful garden sphere :
I've been thinking about making a shape like this for a long time, which is why I made hemispherical clay mould, in which I could build it.  And the fossil shell is also a spring mold which I made a while back.  It worked out pretty much as I had hoped.  We'll see if it dries and then makes it through the two firings okay.  It has a hole in it, so if I put it in the garden, I can set it on a short post / rebar, to keep it from rolling.  If I make more of them, I'd be tempted to make two holes, and add them to a garden totem.  I think that would look really good.

Once I get some good lighting, I want to take better photos of the three sea themed trinket boxes which came out of the kiln today.  They turned out exceptionally well, and this is one of the first times the glazes turned out as well or better than I had hoped.

Here is the batch that came out today :
There were a lot of good pieces in this batch.  I can't wait until I have a chance to do them justice with proper photos.

The bowl at the bottom right, with the blue and white glazes, is part of my set of 4 nesting bowls.  Unfortunately, the other 3 didn't make it into the kiln at the same time.  So hopefully they will make it into the next firing, and I can pick them up this weekend.  I'm really pleased with how the glaze worked out on this one.

As for the pine needle weaving, I think I'll close off this post, and give it its own post, as it deserves.

Wednesday, February 28, 2018

Finished Items : Plates and Mugs and Such

I've fallen behind in posting lately, due to a combination of having a particularly busy life at the moment, and being too tired at night to post, and the weather being very dark, so I am finding it hard to take photos with any decent lighting.  But enough excuses, I brought some finished pieces home recently, and will post a few, since I hope to be picking up more this coming weekend.

Let's start with some plates :
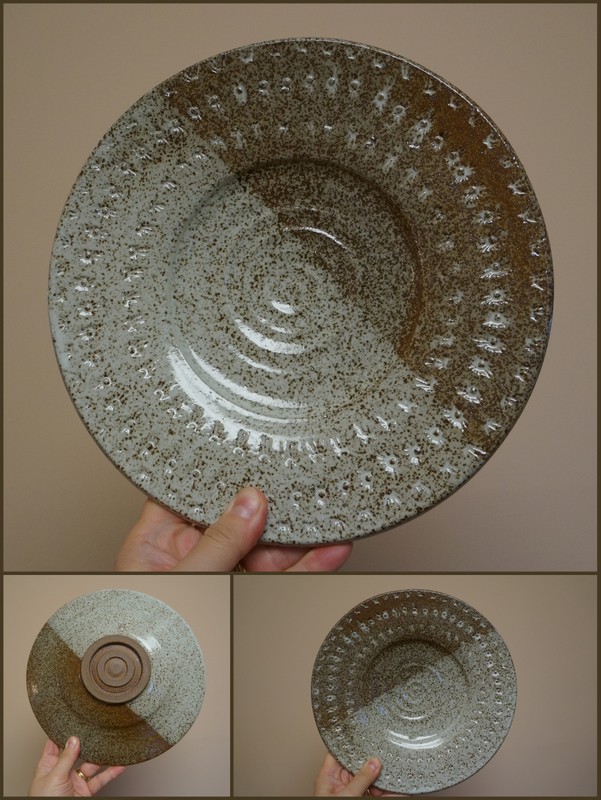
1) This plate was thrown from 1700g of BMix clay, and textured with my handmade stamps.  The stamps were highlighted in Deep Blue glaze, before dipping in White and Daly Blue glaze.  I am liking the soft purple which results from the overlap, and will have some upcoming pieces featuring more of this glaze combination.

2) This plate was thrown from 1900g of BMix clay, and carved to give it that rough texture.  It is glazed in Amber Celadon and Deep Blue glazes.  I like this strong glaze combination, although the visual texture comes through so much more on the Amber Celadon side.

3) This cute little mug was thrown from 700g of H440 clay, and decorated with one of my handmade stamps, to which I added white slip dots.  It features a wiggle wire cut bottom, and is glazed inside and on half the outside with Bamboo glaze, and then dipped halfway into Daly Blue glaze. 

4) I'm not sure if I should call this big boy a mug or a soup bowl, or what.  It was thrown from 900g of H440 clay, and since it was so large, I gave it two handles.  It also features a wiggle wire cut bottom, and my notes indicate that I glazed the bottom part of the mug in White glaze, then Matt Green, and used Deep Blue on the inside and top.  But I hardly see any White at all.  That H440 clay is quite dark and speckly.

5) This little guinomi or sake or whiskey cup, was thrown from BMix clay, and then while soft, I pressed into it trimmings of Willamette Yellow clay.  For the most part, the trimmings stayed.  Although if I tried this another time, I think I would add some slip before pressing in the trimmings.  It is glazed in Malcolm Davis Carbon Trap Shino.  Shino is a difficult and unpredictable glaze, but this time it really performed.  I love the contrast between the deep orange inside and at the foot, and the creamy light outside, and the almost metallic rich brown/gold highlights on the iron-rich trimmings.

6) This lidded jar was thrown from H440 brown clay (1300g for the body, and 700g for the lid) and decorated with handmade stamps, and roughly brushed BMix slip.  I threw it back in October 2017, but I was saving it, waiting on the Daly Blue glaze becoming available, and also toying with the idea of saving it for a soda firing.  So I've finally glazed it in the Daly Blue, both inside and out.  I am very pleased with how it turned out.

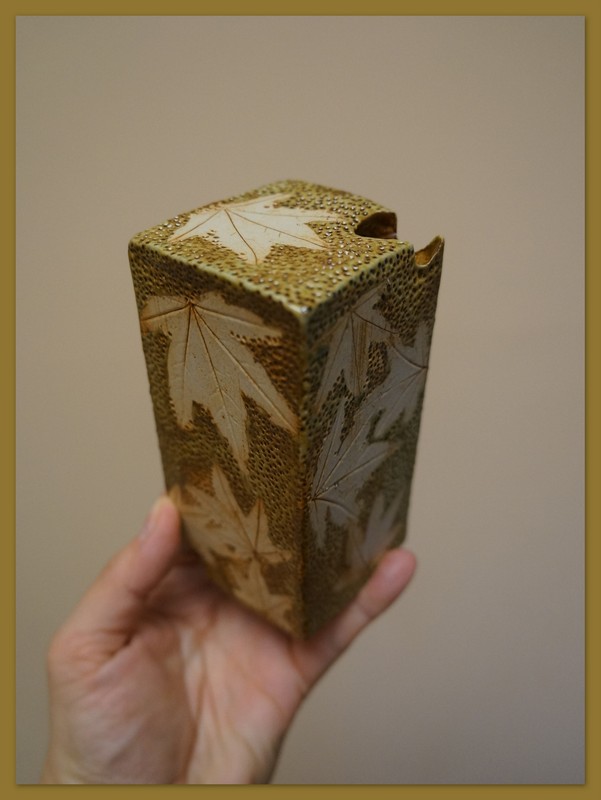
7) This set of stacking containers with lid, was also created back in November 2017.  It was built from slabs and extruded Willamette Yellow clay.  It is unglazed outside, displaying the natural beauty and brown colour of the clay.  On the insides, it is glazed in Bamboo, which has become one of my favourite glazes over the darker clays.  Each side is stamped with a different handmade stamp, and the impressions are glazed to highlight them : the trees in Matt Green (with stars in Bamboo), the swirls in Deep Blue, the celtic knots in Daly Blue, and the sun in Bamboo.  The branch on top was darkened with Kingsmill Wash, which I applied and then sponged off, to leave the stain in the crevices.

8) These are two hydrangea leaf plates, formed from BMix clay back in November, when we still had leaves available.  The larger one features two ladybugs, and the smaller one only one ladybug.  They were glazed in Tam's Green, which is a very natural leaf colour, and also shows the texture beautifully.  The ladybugs are detailed in Red and Black underglazes, and then glazed in Clear.  The are time consuming but very satisfying to me.

9) These two BMix plates are formed from leaves of my beloved Davidii involucrata (dove or handkerchief) tree.  They each feature two ladybugs, and are glazed in Tam's Green.

10) When the weather improves, I can't wait to get outside and build another totem from all the pieces I've been assembling throughout the winter.  These are two more leaves for my totem, both glazed in Tam's Green.  The one on the left with rounder edges is from a fig tree.  The one of right with the pointy leaves, is from an oakleaf hydrangea.  I only added one ladybug to this set.

That's it for photos.  I hope to post more as soon as I find suitable conditions, and am not too busy.

I also just finished a raku firing on the weekend, and I hope to get better photos of these soon, but here is a quick shot of the four pieces I fired :
I hope to start some pine needle weaving on at least one of them this weekend, as I will be attending a weekend class with Lynette, Linda Doherty's sister, who does some beautiful pine needle weaving in collaboration with Linda (who makes the pottery).  I am excited for this opportunity.

Sunday, January 21, 2018

Plates and Ammonites

I am sore and tired from being in the studio all day today, but very happy with how all my pieces are progressing.

I finished all 5 plates now.  When I made some plates previously, they ended up a little thicker and heavier than I had liked.  But Fredi challenged me to take them off the wheel, check the thickness, and put them back on to trim more if they were not done.  So I did that.  One plate, I ended up centering and trimming 4 times, but in the end, I am very pleased with the results.

I added a handle to my mug, but it was too ordinary for me, so I added a little snail on the rim.  Poor little guy, I think one day he will have his eyes snapped off, but hopefully not any time soon.

Fredi showed us how to chatter with a specialized tool, and also just with a metal rib.  I didn't realize I could do that with my metal rib.  So now all the latest plates feature chattering marks.  Most of them my signature multiple ring foot (Fredi called it a bulls-eye pattern).  Even though it will make them a bit heavy bottomed, I really love the look of that foot.

I finished up the texturing of my first ammonite.  I also added a couple of lugs at the back for hanging it.  I think it could turn out quite well.  I'm actually quite excited about this one.  And I still have the big one to finish also.  I'm not so sure about that middle one, I may finish it or not, depending on what else I have going on.

Toward the end of the day, I decided to try to make some penguins, for the raku firing which will be end of February, so I should have some pieces ready for it soon.  Since the photo, I flattened out the neck of that penguin on the left, so it doesn't balloon out anymore.  They could end up okay.

Wednesday, January 17, 2018

Back in the Studio

I had my first class of both courses this week.  The Sunday course on "Sets and Settings" with Fredi Rahn, and the Wednesday Porcelain course with Tanis Saxby.  I'm soooo excited and relieved to be back in the studio.  It was really difficult being locked out for the past couple of months.

In Fredi's class, I got off to a good start by throwing 5 plates.  I did a bit of stamping on them today, and trimmed two of them (although I needed to force them with a hair dryer, and even then the clay was so soft and sticky that the trimmings kept getting stuck on the plate, and I dented the rims a couple of times trying to handle them).  Here are a couple of the stamped plates :

I don't know why the photo quality is so poor, but anyhow, after taking this photo, I decided to trim a swirl into the plate on top also, and it looks even better now.  All my plates feature my hand made stamps, which I am enjoying very much.

This one I went a bit crazy with on the stamping, but I am fairly pleased with the result, even if a bit busy.

These floral stamps have really served me well.

I have a final plate which was too damp to stamp today.  I also have a very beautiful hump mould which I threw in clay, and need to carve out once a bit dryer.  I can't wait to get that bisque and into action.  And the final piece from Sunday was a mug that I threw, which needs to be cleaned up / trimmed and a handle attached.

Tanis encouraged us to think of a form today that we would want to create, and encouraged us to try several attempts at it, learning from each, until we got something we were happy with.  Anyhow, one of my thoughts is a wall-gripping dragon, but I don't think that will be a porcelain project, I'll eventually make one in sculptural clay.  So my next thought was the ammonite shape which has haunted me for a long time now, and I keep saving screenshots of them on Instagram.  Such as this one :
So today I made three different attempts, each one trying a slightly different approach.  All need to firm up before I do more work on them, but I can decide next week if I want to continue with all 3, or just pick my favourite one, and work with that.  So here they are :

The first attempt, was to lay a slab on the wheel, and draw the spiral (while the wheel was turning), and then shape the slab.  I ended up putting some plastic wadding in the outer spiral, to give it that round shape.  But it was pretty difficult/impossible to wad the inner part of the spiral, so I will just carve / press that part.  This approach showed some promised, but I decided I may be able to improve on it :

Here, the first attempt is shown at the front / bottom, and I've started to work on adding the texture.  The second attempt (behind / above) was to lay a slab, draw out the spiral, and then add extra clay to provide the rounding.  But that was a bit time consuming to smooth and round the clay.  And the center was still pretty flat, as I wasn't sure I wanted to continue adding smaller and smaller coils there.  When it is firm I would carve out  some of the excess clay from the back, at least in the outer part of the spiral.

My third thought and approach was to throw a big slab of clay on the wheel (I needed to borrow an extra large bat for this one), and shape it the thickness I wanted, before drawing the spiral :
So far this one feels the most promising, as I have a wonderful curved shape to work with, and a nice thickness of clay (again, I will carve out the excess later).

So these are the three attempts.  Not bad for one class.  I look forward to playing with any or all of them next time, learning improvements to my process as I go along.

If I can, I will add some holes for potentially hanging these.  Likely inside the first spiral, so they are not visible from the outside.  That should be nice.  I'm excited.  This is a really nice project for me.

When I have a chance, I'll post photos of a few items which I picked up Sunday, as they were stuck in the cage over the break.  Most of them totem pieces, and leaf with ladybug plates.  But a few other items also.

Sunday, December 17, 2017

More Finished Items : Mugs, Vases, Plates and Platters

I wasn't able to pick up any more finished items today, but I was able to get into the kiln shed and peek into the locked cabinet, and see a number of my pieces.  A plate which is very pretty, and a number of small leaf plates which turned out well.  January, I guess.

In the meantime, I will post the remainder of what I have picked up so far, from the Fall session :

8) This little mug is thrown from 700g of B-Mix (white) clay.  I experimented with highlighting the stamp marks with Deep Blue glaze, Black stain, and Tenmoku glaze.  All three of them  showed through nicely through the Ash Yellow glaze, but the glazes are a bit more distinct than the stain.

9) This mug is thrown from 800g of H440 brown clay, and stamped with my handmade floral / sunburst clay stamp.  I glazed it Bamboo inside and out, but experimented with leaving the handle unglazed, along with the bottom, which shows the pattern from my wiggle wire.  I like how the handle is smooth yet gritty, and I think I'll experiment with this again.

10) This little mug started as 700g of H440 clay.  My notes say that I highlighted the hand stamped texture (alternating dots and feathery patterns - not very visible in this photo) with Deep Blue and Ash Yellow glazes.  I then glazed it in White inside, and Daly Blue outside and overlapping half the inside.  I like the soft lilac that emerges from the Daly Blue on White.  I'll need to experiment more with this combination.  The bottom part of the mug is unglazed, revealing the deeply speckled brown clay, and the wiggle wire bottom.

11) This mug was thrown back in July 2017, from 900g of B-Mix white clay.  It is heavily stamped, and the stamp marks highlighted with Deep Blue, Tenmoku and Matt Green glazes, then the whole mug is sprayed in Celadon.  It is the same glaze combination as the platter in my prior post.  A very satisfying combination for me.

12) My notes say that this 900g H440 brown clay handstamped mug was touched up Black stain, then glazed Bamboo, and Matt Green over.  Pretty nice.  I like the funky handle.

13) Just to mix it up, here is another totem piece from extruded B-Mix, with a touch of Kingsmill stain, and wax on the leaves, and then dipped in Tam's Green.  But it seems I didn't mix up the Tam's Green again, as it turned out more gold/brown than green.  But still very nice.

14) This leaf plate was created from a slab of B-Mix, with the imprint of an Oakleaf Hydrangea leaf, finished in Tam's Green (brushed) then sprayed Clear.  The ladybug is of course finished with Red and Black underglazes.  Very cute.

15) This grape design plate features the imprint of grape leaves from my garden.  The "grapes" are finished in Red and Purple underglazes, and the leaf in Matt Green, before being sprayed Clear.  I pushed two holes through the foot ring, so it could be wired and hung from the wall.

It's interesting, I met someone the other day who bought one of my platters last year, and they were still trying to figure out how to set it up on a stand for display.  It had not occurred to me that someone would buy a platter and try to display it.  So I should think more about providing a means for hanging them, just in case.  Or sell them with a plate stand, if I could find some good strong ones.

16) This funky vase was thrown from H550 grey clay, and then I flattened one portion of it, to add a Red underglaze peony using a stencil I borrowed from my friend Roma.  It is glazed White inside, and Flambe Red (our new replacement for the ill-behaving Copper Red) outside.  I can't remember how I finished the stencil part, I must have glazed it clear there.  But I didn't make a note of it at the time (I must have been in a rush).

17) This marbled pot was B-Mix (smaller stripes and cross at bottom) in H440 clay.  It has a rolled / hollow rim, and is finished in Tam's Green, according to my notes.  But it sure looks more like Ash Yellow than Tam's Green.  Again, I must not have mixed it well that day.  I think that was the day the Ash Yellow was very thick, so I was trying to dip it very quickly, and not stir it too much.

18) I've saved a number of pots from Fredi's Put a Lid on It course, since they were so much work, and I may save them for a wood or soda firing.  This one is H550 grey clay finished in Ash Yellow and the new Daly Blue.  I like the blue in the underside of the lid.

19) This platter cracked ever so slightly in the bisque firing (actually, I think it cracked as I was handling it subsequent to the firing), and I knew it could at best be an adornment to my garden, but I also thought it could look pretty spectacular, even if only for the garden.  So I glazed it anyhow, with Tam's Green.  It is just as spectacular as I had hoped, and will be happy to use it in the garden in the Spring.  I will try again with this platter again next year.

I think that's it for anything I can post before Christmas, anyhow.  But I'll look back on my notes, whether I missed anything.

Finished Items from the Fall Session - Plates, Platters and Mugs

I've been pretty pleased with  some of my recent work.  If all goes well, I will pick up more today.

1) It seems one can never have enough platters.  I like how this one turned out.  It features imprints from my handmade stamps, on BMix clay, highlighted in Deep Blue, Matt Green and Tenmoku glazes, with a bit of Tenmoku glaze to highlight the texture of the rim and handles, and then sprayed all over with Celadon.  A really fine piece.

2) This was one of my plates thrown from the H440 brown clay, which ends up so very freckly.  I highlighted some of the imprints (again, from my handmade clay stamps) in White glaze, and then dipped it in White, overlapped with Clear.  A subtle and pleasant earth tone result, and so very very freckly.

3) This mug was thrown from approx 800g of the H440 brown clay.  It is finished with a touch of Black stain to highlight the celtic knot pattern, and then Bamboo inside and out, leaving the bottom portion unglazed to show the dark brown clay, and bottom with the pattern of the wiggle wire.

4) This mug is also thrown from 800g of H440 clay, and finished in the new Daly Blue glaze, with the bottom portion and wiggle wire bottom unglazed.  I like how the new glaze is quite flowy.  Although the bright blue is quite darkened and subdued by the dark clay.

5) This is what the Daly Blue looks like on a white clay, this one B-Mix.  It shows a pretty sky blue, with touches of lilac.  This little mug features handmade clay stamping, an extruded handle, and is finished in a White glaze along the profile at bottom (the profile tool borrowed from my fellow potter, Herb) and inside, and then the outside dipped in Daly Blue.  I love the little ring of purple and blue inside the rim of the mug, where the Daly Blue has overlapped the white.

6) Similar to (4), but smaller, with a little thumb button on the handle.  Sweet little mug.

I'll post a few more next time I have opportunity.