I couldn't wait until Wednesday to do my trimming and piercing of the piece I started last week. Tonight I got my hands into some leftover sculptural clay I had in the garage, and started to play. The fun thing about still being a newbie to pottery, but being fairly confident in my abilities, is that I will attempt anything, not knowing how difficult it could possibly be. Then I'm pretty determined, so once I realize how difficult it is, I can't stop until I conquer it.
Recently I have been inspired by the sculptural works of John Brien, "jbrien145" on Instagram. Look at this beauty:
I normally wouldn't know where to start on something like this, but one of his comments indicated that he usually built these from coils. I'm never even built a coil pot before, but I figured, how hard could this be? So I started to build a sculpture of my own tonight.
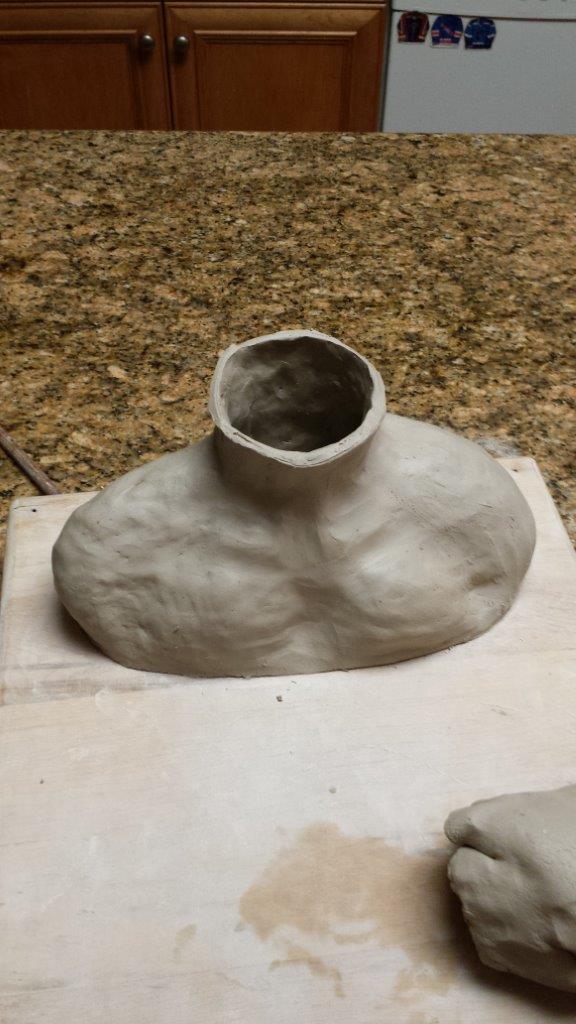
To this point, it was going fairly well. I found that instead of adding coils, I was adding sections of clay which I had flattened with my fist, and then tried very hard to smooth out the seams from the inside and the outside :
I could start to see the shape emerging, just needed to work my way into the neck and head :
At this point, it became less clear how I was going to be able to add the head... But I made an attempt anyhow :
But I could see that the weight of the head was going to collapse the neck, no matter what I tried... How would John Brien do it? Would he stuff it with paper for support? Or would he let the base dry a bit before adding more coils? At this point, I wished I had at least watched a YouTube demo of someone creating a sculptural bust. I could tell that the neck was going to be the tricky part, so I cut it back to where it felt self-supporting :
I think I will let that base firm up a bit, and separately I'll create a head from sections or using a pinch-pot technique (again, don't have much experience with that, but at least know the concept), and then once both pieces are a bit more firm, try to attach them. Problem is that I won't be able to get my hands inside at that point, to properly smooth the clay inside, so I'll use more of a slip-and-score attachment.
For now, I've laid a moist paper towel along the rim of the neck, so it won't dry out too much, and have draped plastic over the whole thing. It's late, so I'll get back to playing tomorrow night or the following. Wish me luck!
Monday, September 28, 2015
Sunday, September 27, 2015
(Poor) Tribute to Eric Stearns - Pierced Vessel in Progress
One of the ceramic artists I have been admiring on Pinterest is Eric Stearns. He does wonderful, precise pierced work, and finishes with beautiful crackled raku glazing. Here is a photo I pulled from his website, which I would encourage you to visit, for more beautiful work, and information about the artist.
When I threw the spherical piece in workshop, I knew I wanted to do something with it - carve it, pierce it, distort it... So I considered various ideas (which I may use on the next spheres I throw), but decided on a pierced item, inspired by the work of Eric Stearns.
Here's my go it marking out where I will do the piercings. I like how it was going at the front / start of the piece :
Then I started to lose the pattern toward the side, partly because I wasn't sure where to take it, and partly because I was getting lazy...
I know now what I would have done to revive the pattern, but after finishing the back, even though it looks too plain and not as exciting as the front, I decided to leave it as is. It will still be enough challenge to finish it, and will be a good learning experience.
I am thinking to trim the foot (I want to make the base smaller and crisper, and then add my artist's stamp) before I weaken the vessel by piercing it. Just in case. I'm not so skilled at trimming yet, and don't want to tempt fate too much. :-)
When I threw the spherical piece in workshop, I knew I wanted to do something with it - carve it, pierce it, distort it... So I considered various ideas (which I may use on the next spheres I throw), but decided on a pierced item, inspired by the work of Eric Stearns.
Here's my go it marking out where I will do the piercings. I like how it was going at the front / start of the piece :
Then I started to lose the pattern toward the side, partly because I wasn't sure where to take it, and partly because I was getting lazy...
I know now what I would have done to revive the pattern, but after finishing the back, even though it looks too plain and not as exciting as the front, I decided to leave it as is. It will still be enough challenge to finish it, and will be a good learning experience.
I am thinking to trim the foot (I want to make the base smaller and crisper, and then add my artist's stamp) before I weaken the vessel by piercing it. Just in case. I'm not so skilled at trimming yet, and don't want to tempt fate too much. :-)
Thursday, September 24, 2015
Back in the Studio Again, with Mud in My Eye
After what seemed an unbearably long wait, I'm back in the studio again, taking a course with Jay MacLennan called "Here's Mud in Your Eye". I just learned that this as an old English drinking toast. Weird, but appropriate, since we are making beer steins and mugs and pitchers and goblets and other vessels related to storing and drinking alcohol (or substitute your favourite drink).
I was quite pleased by my ability to get back on the wheel, and coax the clay into shapes which were close to what I was trying for. Jay demoed a number of pieces, which he always makes look so easy. The one I liked, and tried to replicate, was this "weisen" beer glass, which is apparently for drinking wheat beer. I don't drink beer, but I sure like the shape. This was Jay's demo, using some wonderful new Yellow iron oxide clay, which will turn reddish brown when fired, to which he added strips of grey clay, and marbled it in, and then added a piece of glass, which will become a drip of glaze when fired (or at least that's the theory) :
So with this shape in mind, I threw 4 similar shapes, as well as the shorter "stein" shape, to which I'll add a handle next week. Mine are thrown in white clay, with a bit of Jay's yellow clay marbled in (I'm so hooked on this effect, I am dreaming of the day he'll make it available for sale, and I can marble like crazy) :
I was quite pleased by my ability to get back on the wheel, and coax the clay into shapes which were close to what I was trying for. Jay demoed a number of pieces, which he always makes look so easy. The one I liked, and tried to replicate, was this "weisen" beer glass, which is apparently for drinking wheat beer. I don't drink beer, but I sure like the shape. This was Jay's demo, using some wonderful new Yellow iron oxide clay, which will turn reddish brown when fired, to which he added strips of grey clay, and marbled it in, and then added a piece of glass, which will become a drip of glaze when fired (or at least that's the theory) :
So with this shape in mind, I threw 4 similar shapes, as well as the shorter "stein" shape, to which I'll add a handle next week. Mine are thrown in white clay, with a bit of Jay's yellow clay marbled in (I'm so hooked on this effect, I am dreaming of the day he'll make it available for sale, and I can marble like crazy) :
Good thing that even though I don't drink beer, my husband enjoys it. So I'm thinking there may be a Christmas gift or two in that set...
I was pretty happy with that result and output for our 3 hour class. Then I stayed on for the next 4 hours, and made another 4 vessels, this time focusing on 3 vases where I was trying for a narrow neck at top (mine have so far been fairly open-necked), and then an attempt at a beautiful spherical shape.
I just realized I didn't take a photo of the big sphere. I am toying with the idea of carving that one. We'll see.
For one of the vases, I decided to try the "medieval" base which Jay demo'd during class. So I intentionally finished it fairly straight, and gave it a rim which I could also alter, to match the feel of the base. I'm really liking this one.
I can't wait until next week. Except for that handle. I don't like making handles. Although I could make an exception for a marbled one... :-)
Wednesday, September 2, 2015
Raku Results : Obvara Raku Vases and Plate
I had intended to post all the items from my Spring Raku pottery course, but realize that I had not gotten to the obvara items. The obvara raku, which involves dipping the hot pottery into a fermenting yeast mixture, then into cold water (see this post for more photos of the obvara raku process), was the technique I was least interested to try. I'm not sure I like the effect, but I'm glad for the experience.
I had seen some videos online of someone who used the obvara method to finish some sodium silicate crackled pots, and the result was pretty interesting. So I decided to do the same. Perhaps it was our obvara recipe, or other factors, but the obvara finishing didn't accentuate the sodium silicate texture, it seemed to make its own visual texture. Oh well, still interesting, I guess.
This first pot turned out quite dark, like burnt toast. We noticed that if the items were allowed to cool a bit before immersing them in the obvara mixture, they turned out a lighter color. So that's what I did for the next one.
This one is almost too light. I like the effect on the bottom, but the sides of the pot are quite pale, for my liking. I think when I realized how light it was, I even tried dipping it back again in the obvara, but it had already cooled, and wasn't taking on more color. I like that the crackle effect shows through nicely on the sides, though.
I had created a couple of small plates from a clay slab, this one shaped over some sort of round disk, I think it was a container lid. It gave me another item to experiment with. I was amused by the very visible tong mark, which shows up 6 o'clock in the bottom left photo, and at 8 o'clock in the bottom right photo. When I first started ceramics, this sort of thing would have driven me crazy, I would have seen it as a flaw. Now I see it as a fun effect, an artifact providing clues to the artist's process.
I had seen some videos online of someone who used the obvara method to finish some sodium silicate crackled pots, and the result was pretty interesting. So I decided to do the same. Perhaps it was our obvara recipe, or other factors, but the obvara finishing didn't accentuate the sodium silicate texture, it seemed to make its own visual texture. Oh well, still interesting, I guess.
This first pot turned out quite dark, like burnt toast. We noticed that if the items were allowed to cool a bit before immersing them in the obvara mixture, they turned out a lighter color. So that's what I did for the next one.
This one is almost too light. I like the effect on the bottom, but the sides of the pot are quite pale, for my liking. I think when I realized how light it was, I even tried dipping it back again in the obvara, but it had already cooled, and wasn't taking on more color. I like that the crackle effect shows through nicely on the sides, though.
I had created a couple of small plates from a clay slab, this one shaped over some sort of round disk, I think it was a container lid. It gave me another item to experiment with. I was amused by the very visible tong mark, which shows up 6 o'clock in the bottom left photo, and at 8 o'clock in the bottom right photo. When I first started ceramics, this sort of thing would have driven me crazy, I would have seen it as a flaw. Now I see it as a fun effect, an artifact providing clues to the artist's process.
Friday, August 21, 2015
Pottery Photos
I've been trying to take some more "professional" looking photos of my pottery, and mostly posting them on Instagram (where I am @dragonclawz), since the immediate feedback is very satisfying (I'm addicted to "likes"). So I thought I'd share a few of them here also, on the blog which few people seem to read, but I still like to flip through it sometimes.
So starting with some of my raku pottery pieces, this one is from a foil saggar firing :
And crackled effect from sodium silicate :
Naked raku pottery :
Foil saggar raku again :
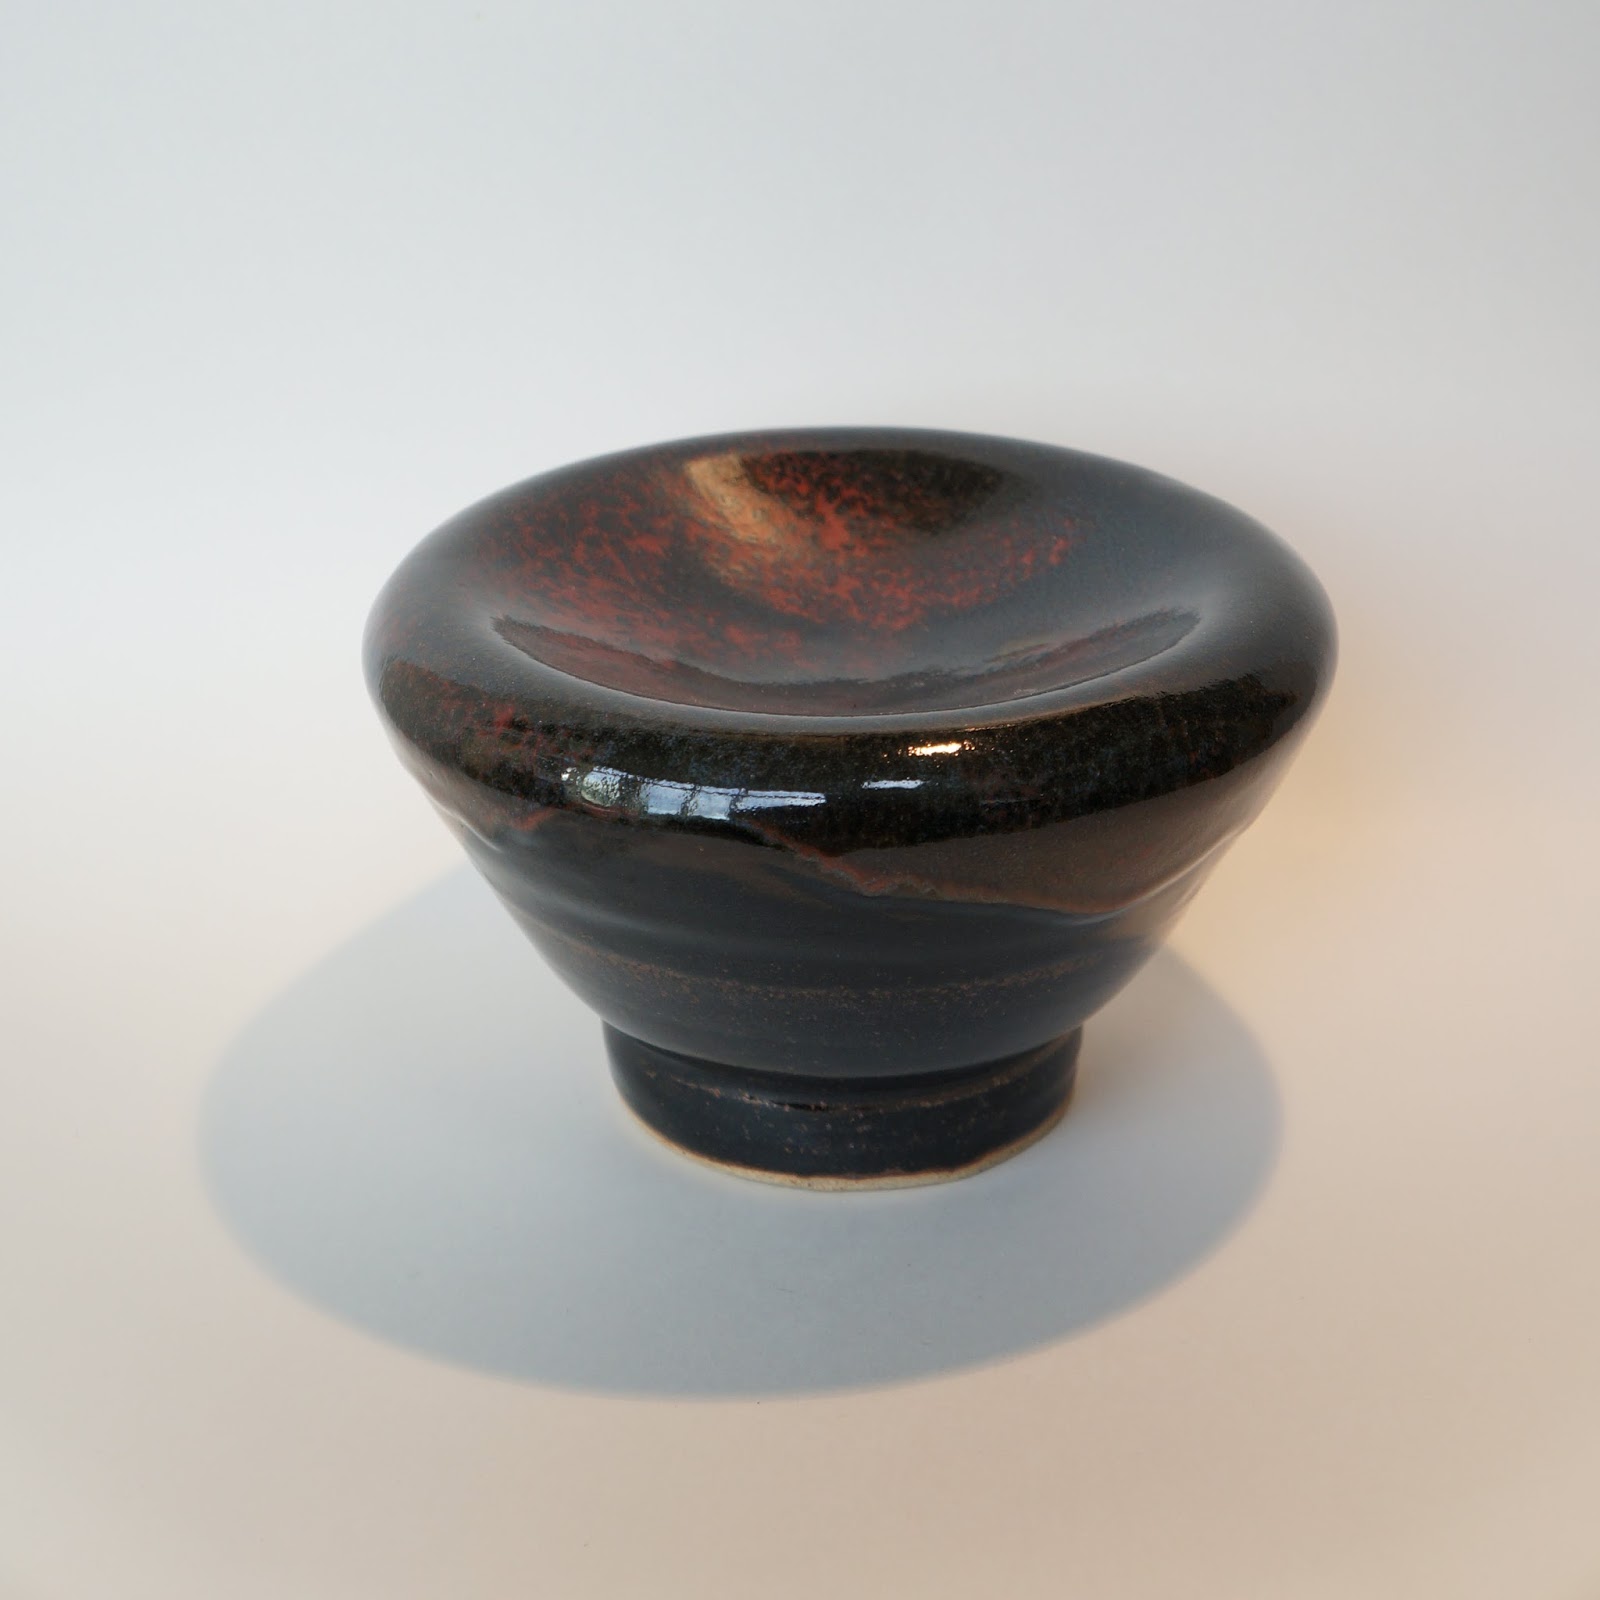
A regular cone 10 glazed piece, thrown as a dome and flipped over :
A glazed raku fired piece :
A sgraffito piece (using green slip) :
And finally, a couple of my vases in "action", holding grasses or flowers from the garden :
So starting with some of my raku pottery pieces, this one is from a foil saggar firing :
And horsehair (and feathers) raku :
And crackled effect from sodium silicate :
Naked raku pottery :
Foil saggar raku again :
A regular cone 10 glazed piece, thrown as a dome and flipped over :
A glazed raku fired piece :
A sgraffito piece (using green slip) :
My raku fired lady (her dress was glazed in a bright red, but apparently there was not enough reduction, so she ended up gold/beige) :
And finally, a couple of my vases in "action", holding grasses or flowers from the garden :
Saturday, July 4, 2015
Fimo Mickey Mouse - Attempt 2
Now that my sister Rose's birthday is past, and I don't need to keep this as a surprise anymore, I want to share my second attempt at creating a Mickey Mouse sculpture / figurine from Fimo.
The first attempt - I can't believe it was Oct 2013! - looked pretty promising :
However, after building most of the Mickey Mouse character, I was dismayed that it slowly broke apart into pieces overnight, before I could finish and bake it. I also realized that I would need a wire tail to support Mickey so he would be free standing.
So before my sister's birthday this year, I made a second attempt. This time I bought a thick black wire which could serve as the tail and support, as well as provide internal structure for Mickey, so he would hold together.
I was able to re-use the Mickey head, and just re-attach the ears which had fallen off, but most of the other pieces I couldn't reuse, although at least they served as a model for the new pieces :
I used three pieces of wire. One started in the head, and provided the backbone support and tail. The second provided support in the two legs. The last one provided the support for the two arms. It was much more stable this time, and Mickey was able to stand independently. The arms moved a little bit, not being anchored to the backbone wire. However, I hoped that it would be strong enough, so put Mickey into the oven to bake him.
Sadly, this is what came out of the oven :
Poor little guy had fallen face-first in the oven, knocking off his nose, and breaking his shorts in the process.
I have now realized that it was a mistake to have 3 independent structural wires. On next attempt, they will need to be tied together, with a smaller wire. Alternatively, I will use the thick black wire for head to tail, and then use a smaller wire which I can wrap around and extend to the arms and legs, but as one solid piece.
I may have tried again that night, but I didn't have enough black Fimo. So I have subsequently purchased one, but not in time for the birthday.
So the adventure continues. Although I can't guarantee that it won't be another year or two before the third and hopefully final attempt.
The first attempt - I can't believe it was Oct 2013! - looked pretty promising :
However, after building most of the Mickey Mouse character, I was dismayed that it slowly broke apart into pieces overnight, before I could finish and bake it. I also realized that I would need a wire tail to support Mickey so he would be free standing.
So before my sister's birthday this year, I made a second attempt. This time I bought a thick black wire which could serve as the tail and support, as well as provide internal structure for Mickey, so he would hold together.
I was able to re-use the Mickey head, and just re-attach the ears which had fallen off, but most of the other pieces I couldn't reuse, although at least they served as a model for the new pieces :
I used three pieces of wire. One started in the head, and provided the backbone support and tail. The second provided support in the two legs. The last one provided the support for the two arms. It was much more stable this time, and Mickey was able to stand independently. The arms moved a little bit, not being anchored to the backbone wire. However, I hoped that it would be strong enough, so put Mickey into the oven to bake him.
Sadly, this is what came out of the oven :
Poor little guy had fallen face-first in the oven, knocking off his nose, and breaking his shorts in the process.
I have now realized that it was a mistake to have 3 independent structural wires. On next attempt, they will need to be tied together, with a smaller wire. Alternatively, I will use the thick black wire for head to tail, and then use a smaller wire which I can wrap around and extend to the arms and legs, but as one solid piece.
I may have tried again that night, but I didn't have enough black Fimo. So I have subsequently purchased one, but not in time for the birthday.
So the adventure continues. Although I can't guarantee that it won't be another year or two before the third and hopefully final attempt.
Thursday, July 2, 2015
Raku Results : Foil Saggar Pots
When I finished my raku course, I tried not to post all my photos at once. But suddenly a month has gone by, and I still have many to post. So far I've posted photos from the firing, then the horsehair raku pots, the glazed raku pots and pendants, my naked raku pot, and a peek at my raku lady on display at Shadbolt Center for the Arts.
One of the raku methods I was least familiar with, and didn't know if I'd be satisfied with the outcome, was the foil saggar firing. We were told to collect up various organic materials, and bring them to class. Dried seaweed, fertilizer, horse dung (I was very tempted to collect some at the equestrian center, but I'm glad I didn't), dried rose petals, copper wire, etc.
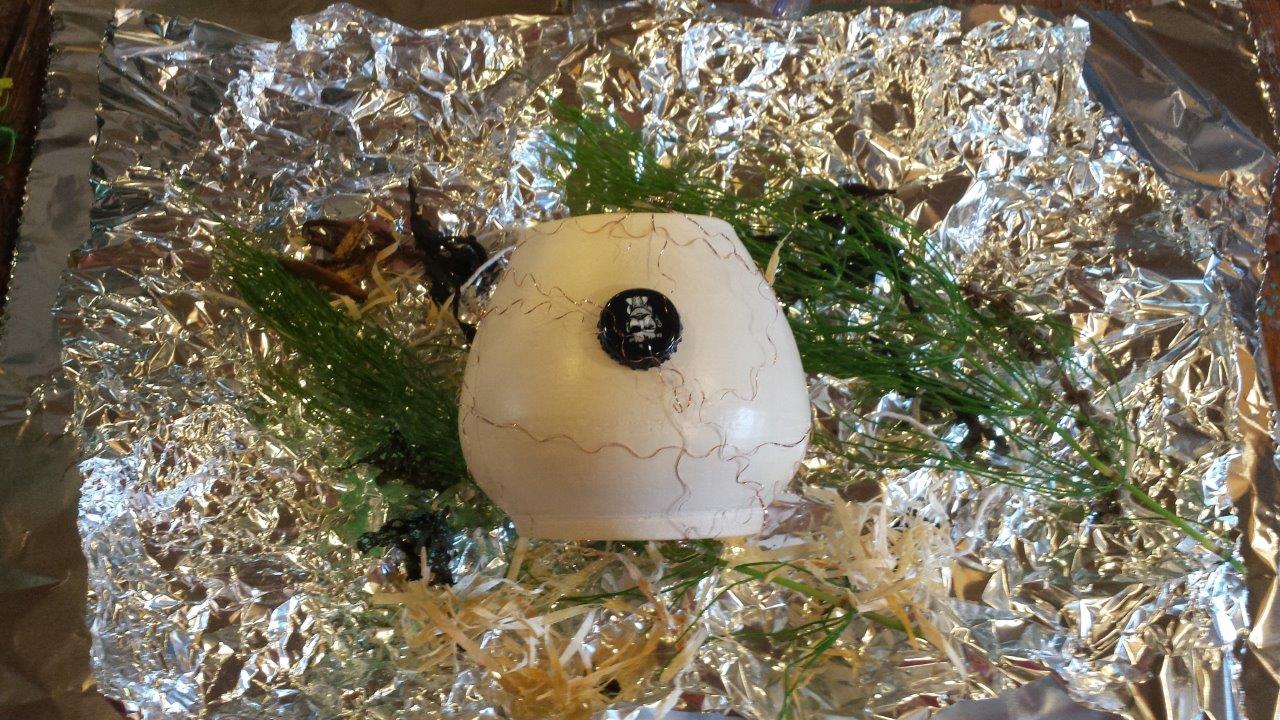
Here is my first pot, getting wrapped in the organic materials and foil :
I can't remember all that was in there, but from the photo, I see pine cones, bottle caps, horsetails (which contain silica), wood shavings, sea weed, some immature cottonwood fluffs, and a sprinkle of "magic dust".
I wrapped the pot itself in copper strands (from a pulled apart metal scrubby) and the bottle cap.
The second pot had similar ingredients, as well as dried burdock, and some pellets of fertilizer. It was also wrapped in the copper wire, bottle caps, but also cotton string which had been soaked in salt, and some fresh rhododendron flowers :
They were then wrapped in foil and fired, and the following week we collected them, and unwrapped them, to reveal our finished pots. Here are some of them, still wrapped in foil. One of mine on the bottom shelf is peeking out :
Here are the final pots from a couple of different angles. I'm pretty pleased with the result :
Here is a closeup of the first one :
...and the second one :
Here's a table full of my classes's creations. I love that one in the front (bottom left in the photo) with the dramatic blackish pink lines. These were also formed by the same copper strands as I used, but somehow the location in the kiln or perhaps another ingredient contributed to the dramatic colours.
It was fascinating to see the wide range of colours, from the pinks to oranges, to shades of grey and black.
Stay tuned for the horsehair raku plates, and the obvara raku fired pieces, when I find time to post again.
One of the raku methods I was least familiar with, and didn't know if I'd be satisfied with the outcome, was the foil saggar firing. We were told to collect up various organic materials, and bring them to class. Dried seaweed, fertilizer, horse dung (I was very tempted to collect some at the equestrian center, but I'm glad I didn't), dried rose petals, copper wire, etc.
Here is my first pot, getting wrapped in the organic materials and foil :
I can't remember all that was in there, but from the photo, I see pine cones, bottle caps, horsetails (which contain silica), wood shavings, sea weed, some immature cottonwood fluffs, and a sprinkle of "magic dust".
I wrapped the pot itself in copper strands (from a pulled apart metal scrubby) and the bottle cap.
The second pot had similar ingredients, as well as dried burdock, and some pellets of fertilizer. It was also wrapped in the copper wire, bottle caps, but also cotton string which had been soaked in salt, and some fresh rhododendron flowers :
They were then wrapped in foil and fired, and the following week we collected them, and unwrapped them, to reveal our finished pots. Here are some of them, still wrapped in foil. One of mine on the bottom shelf is peeking out :
Here are the final pots from a couple of different angles. I'm pretty pleased with the result :
Here is a closeup of the first one :
...and the second one :
Here's a table full of my classes's creations. I love that one in the front (bottom left in the photo) with the dramatic blackish pink lines. These were also formed by the same copper strands as I used, but somehow the location in the kiln or perhaps another ingredient contributed to the dramatic colours.
It was fascinating to see the wide range of colours, from the pinks to oranges, to shades of grey and black.
Stay tuned for the horsehair raku plates, and the obvara raku fired pieces, when I find time to post again.
Subscribe to:
Posts (Atom)